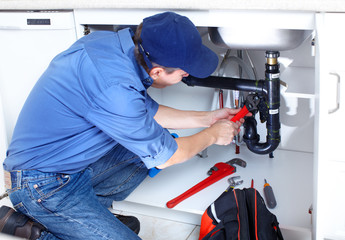
You can handle some things around the house on your own, but professional plumbers should only do water heater repairs. The unit can be dangerous if it is not properly fixed.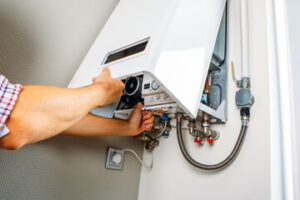
Puddles around the unit or rust on the tank walls are signs of serious corrosion. A sacrificial anode rod can help prevent this from happening, but it will eventually wear down. Keep reading the article below to Learn More.
Thermocouples are one of the most important parts of your gas water heater because they allow you to use your hot water without risking a fire or leaking gas. Thermocouples do this by sensing the pilot flame and sending a signal to your gas valve that it’s time for the gas to be turned on. If this signal stops being sent, your gas valve will shut off your pilot light, and you won’t be able to use your hot water.
If you notice your pilot light is not staying lit, the first thing you should do is check for a faulty thermocouple. If you do not find a problem with your thermocouple, then you’ll want to make sure it is properly insulated and connected. To do this, you’ll need to turn off the gas supply at the gas valve, open the access panel or cover on your water heater, and locate the thermocouple tube. Once you find it, trace the wires leading to it and see where they connect to the gas control valve. Then, open the gas valve to OFF and unscrew the connector nut on the end of the tube with an open-end wrench.
Once you’ve disconnected the thermocouple, you should take it to your local hardware, home improvement, or plumbing supply store for a replacement. Before installing the new thermocouple, you’ll want to make sure it is insulated, because if it’s not, then it won’t be able to sense the pilot flame correctly and will stop working.
You should also test your new thermocouple before reinstalling it, to ensure that it works correctly. To do this, place the red probe of your multi-meter on the end of the thermocouple that is connected to the gas control valve, and the black probe on the other end, closer to the pilot light. Give it a minute, and then check the multi-meter for a reading. A functioning thermocouple should produce a stable reading of 25 millivolts or higher.
You’ll also want to replace the insulator on your thermocouple, because it will be worn down from being exposed to high temperatures over time. This is a simple task, but you’ll need to have the right tools for the job.
Dip Tube
The dip tube is a little-understood but essential part of a water heater system. It is a plastic tube that is designed to float, or sometimes sink, and reach all the way to the bottom of the tank when the water needs to be drawn from it. If the dip tube breaks it will not be able to do its job and pieces of it may begin to find their way into your hot water system. These small pieces of white plastic can clog up appliance filters and faucet aerators in your home. Fortunately, the dip tube is fairly easy to replace and not a costly or complicated procedure for the do-it-yourselfer.
The plastic of a dip tube is constantly underwater and subjected to changing water temperatures, which causes it to break down over time. Once the dip tube begins to degrade it will float or sink to the bottom of the tank and the water will no longer be pulled through it.
Because the dip tube is in a very hot, and often dirty, environment it is also subject to corrosion from the water that fills the tank. The combination of corrosion and acidic water can cause it to deteriorate in a very short time. A deteriorated dip tube will not be able to lift water from the bottom of the tank, which will result in a loss of hot water in your home.
If you suspect the dip tube is deteriorating, first turn off power or gas to your water heater. Then drain the water tank. Next, disconnect the cold water inlet valve on the top of the tank and remove the dip tube by unscrewing the nipple on the inlet port with a pipe wrench. Once the old tube is removed, take your new dip tube and insert it into the inlet port. Be sure to use a tube made from durable materials like cross-linked polyethylene PEX, and ensure it is fastened down on the inlet nipple with the appropriate fastener. Then reconnect the cold water inlet valve, refill your water heater tank, and restore power or gas to your water heater.
Pressure Valve
The pressure valve regulates the water supply to prevent excess pressure building in the tank and causing a dangerous explosion of the hot water system. The PRV is located on the main water line coming into your home and usually directly next to your main shut-off valve. This is a bell-shaped device that has an inner mechanism that can be set or adjusted to maintain a specific pressure level in your home.
Basically, the inner mechanism in a PRV is designed to crack open at a predetermined “set pressure” to allow a portion of the flow of water through an auxiliary passage that is not connected to pipes or fixtures installed downstream from the PRV. When the set pressure is reached, a mechanical spring (or a reference force element) acts to close the valve.
The valve may also be adjusted using an adjustment screw or knob on the top of the valve to change the reference force element and thereby change the relief pressure setting. It can be set to a higher or lower pressure, depending on your personal preference and the water pressure in your area.
To test the pressure valve, turn off your water at the main shut-off valve and then position a bucket or large container underneath the valve. Be sure to wear safe clothes and a face mask to avoid the risk of scalding water or steam that will discharge when the valve is triggered by the over-pressure. Open the water valve to the water heater and slowly lift or lower the handle to see if the valve opens.
If it doesn’t, your water valve is faulty and needs to be replaced. This is a simple DIY job that requires only a few tools, available from a local home improvement or plumbing supply store. However, a qualified professional plumber should be called in to install the new water pressure regulator. In addition, they will likely replace your dip tube as well, which is a fairly easy task that can be done while the water heater is still on.
The Pilot Light
Many homeowners who have dealt with gas-fired appliances, such as furnaces and water heaters, have been told at some point to check their pilot light. A pilot light is a small flame that is kept lit in certain gas-fired appliances, such as your home’s heater or fireplace, to control the flow of gas and turn the appliance on or off.
This is because the thermocouple, which is connected to the pilot light, detects the heat from the flame and controls the main gas valve. When the pilot light goes out, the thermocouple loses its ability to sense the heat and won’t open the gas valve.
The pilot light is very important for safety reasons, since the heat-sensing probe can help prevent a gas leak. This is why it’s important to know where the pilot light is, how to re-light it, and what to do if you can’t relight it.
If the pilot light is extinguished, your water heater will not work, so it’s important to find it and relight it as soon as possible. However, before you do this, make sure that you turn off the gas control valve to your appliance, wait for five minutes for the gases to dissipate, and then reignite the pilot light.
There are several different reasons why your pilot light might go out. It could be because the orifice, which is the tiny cap that controls the size of the flame, has become clogged. It could also be because of high gas pressure. If this is the case, you should call your gas company to request a visit from a technician.
A problem with air supply is another common cause of a pilot light going out. This can happen when the hot water heater is located in a room without much natural air flow. In this case, you will need to install a vent to ensure that there is sufficient air to keep the pilot light lit.
Finally, a blown-out pilot light is usually a sign that your household’s water usage is outpacing your water heater’s capacity. You might need to consider getting a bigger water heater if you are experiencing this issue. A professional plumber can help you determine if your water heater is the right capacity for your household’s needs.